NVIDIA DIGITS installation on Win7
- Ann Liu

- Aug 10, 2018
- 2 min read
Updated: Aug 16, 2018
在實習期間接觸到的深度學習訓練系統 - NVIDIA DIGITS
引用NVIDIA官方的介紹:
”
DIGITS simplifies common deep learning tasks such as managing data, designing and training neural networks on multi-GPU systems, monitoring performance in real time with advanced visualizations, and selecting the best performing model from the results browser for deployment.
“
雖然,已經安裝完後,才開始的紀錄
盡量還原在安裝時的步驟以及碰到的困難 > <
以下為NVIDIA DIGITS安裝步驟:
環境:
os - Window 7
GPU - ROG-STRIX-GTX1080Ti
GPU driver - 397.64-desktop-win8-win7-64bit-international-whql
cuda 8.0
cudnn 5.1
python 2.7
Visual Studio 2013
步驟參考DIGITS官方github教學:
前置作業:
首先,先安裝好GPU驅動和cuda8.0, cudnn5.0,確定電腦可以利用顯卡加速,才能利用VS2013建置GPU加速專案。
安裝Git for windows,方便從GitHub clone專案到電腦 e.g. DIGITS, microsoft-caffe
利用Visual Studio 2013建置caffe on windows專案,其中專案相關設定和問題( ref: https://blog.csdn.net/daiaiji/article/details/73917751),附帶DIGITS也會需要pycaffe(ref: https://blog.csdn.net/qq_14845119/article/details/52415090)建置過程中,需要從設定開啟建置,並標注python來源,安裝Anaconda 2.0,並加入到windows環境變數中。(pycaffe更不容易建置,需要仔細確認設定,還需要把部分程式註解 ,方可成功)
建置好的caffe和pycaffe都需要複製到python2 lib中,才能通過python import caffe的測試
將 PythonPath 環境變數加入pycaffe路徑
即可開始安裝DIGITS
DIGITS 正式開始:
DIGITS安裝參照官方步驟https://github.com/NVIDIA/DIGITS/blob/master/docs/BuildDigitsWindows.md
1. 官方步驟是以python2 digits-deserver指令,我們是在git bash下以執行腳本命令方式執行即可,也就是 sh digits-deserver替代原指令,開啟server。
(可能會碰到許多和import失敗的問題,依照錯誤逐一補齊即可)
成功畫面如下

2. 接下來,開啟網頁視窗連線localhost:5000,就可以看到DIGITS介面。
前置作業較麻煩很多很多,但當建好後,後續安裝簡單好上手。
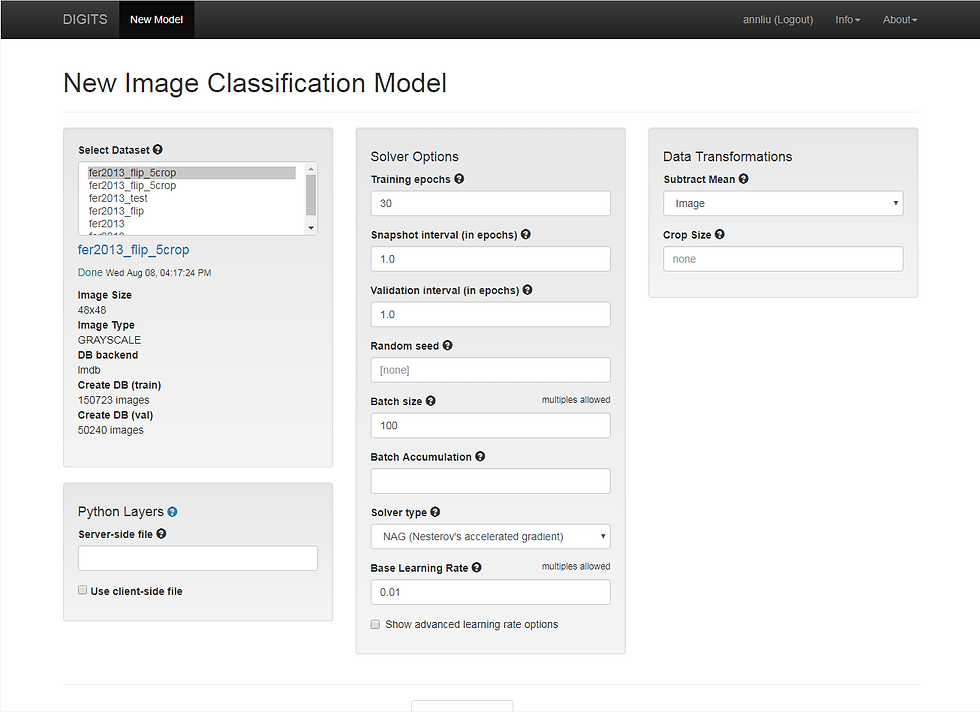
以下將會就DIGITS介面使用作簡單導覽:
DIGITS的首頁有三大項目:Datasets, Models, Pretrained Models


匯入資料集

匯入model
其中包含參數設定、network設計(包含內建設定和自行定義)


設定好後,會產生出Network solver prototxt:

開始訓練後,Train Loss, Val_Loss, Val_Loss視覺化曲線圖:

訓練期間或完成後,都可以藉由sanpshot的weight紀錄,測試圖片結果


Comments